Tuesday, August 16, 2011

Garden critters


Click on this first one to see the first garden critter.  She's a good one.  Lady bugs are wonderful! I saw plenty of them this week.  This photo looks like I used flash but I didn't.  The clouds were moving so fast that my aperture priority had a hard time figuring things out.

And I've also seen plenty of these.  What are they? And why are they eating EVERYTHING? Seriously.  I found them munching on my jalapeno plants and I rarely see anything on those.  They are everywhere I look and that means the road, the house, at the neighbors.They love onions too.  Tomatoes, yep. Pumpkins, yes sir. Cabbage - for sure. Green beans - it's eating a stem that ended up on the back porch.  Can I repel them somehow? 

Monday, August 15, 2011

Harvest Monday - August 15th

Head on over to Daphne's Dandelions and scroll on down to see what everyone else is harvesting.

On the 10th I canned 10 Quarts of green beans.  I'm loving the wide mouth jars for this.  I used my 23 quart Presto Pressure Canner.

On the 12th I harvested the first of my tomatoes and 1 squash.  I have 2 squash plants and they are producing just the right amount for what my husband and I can eat.

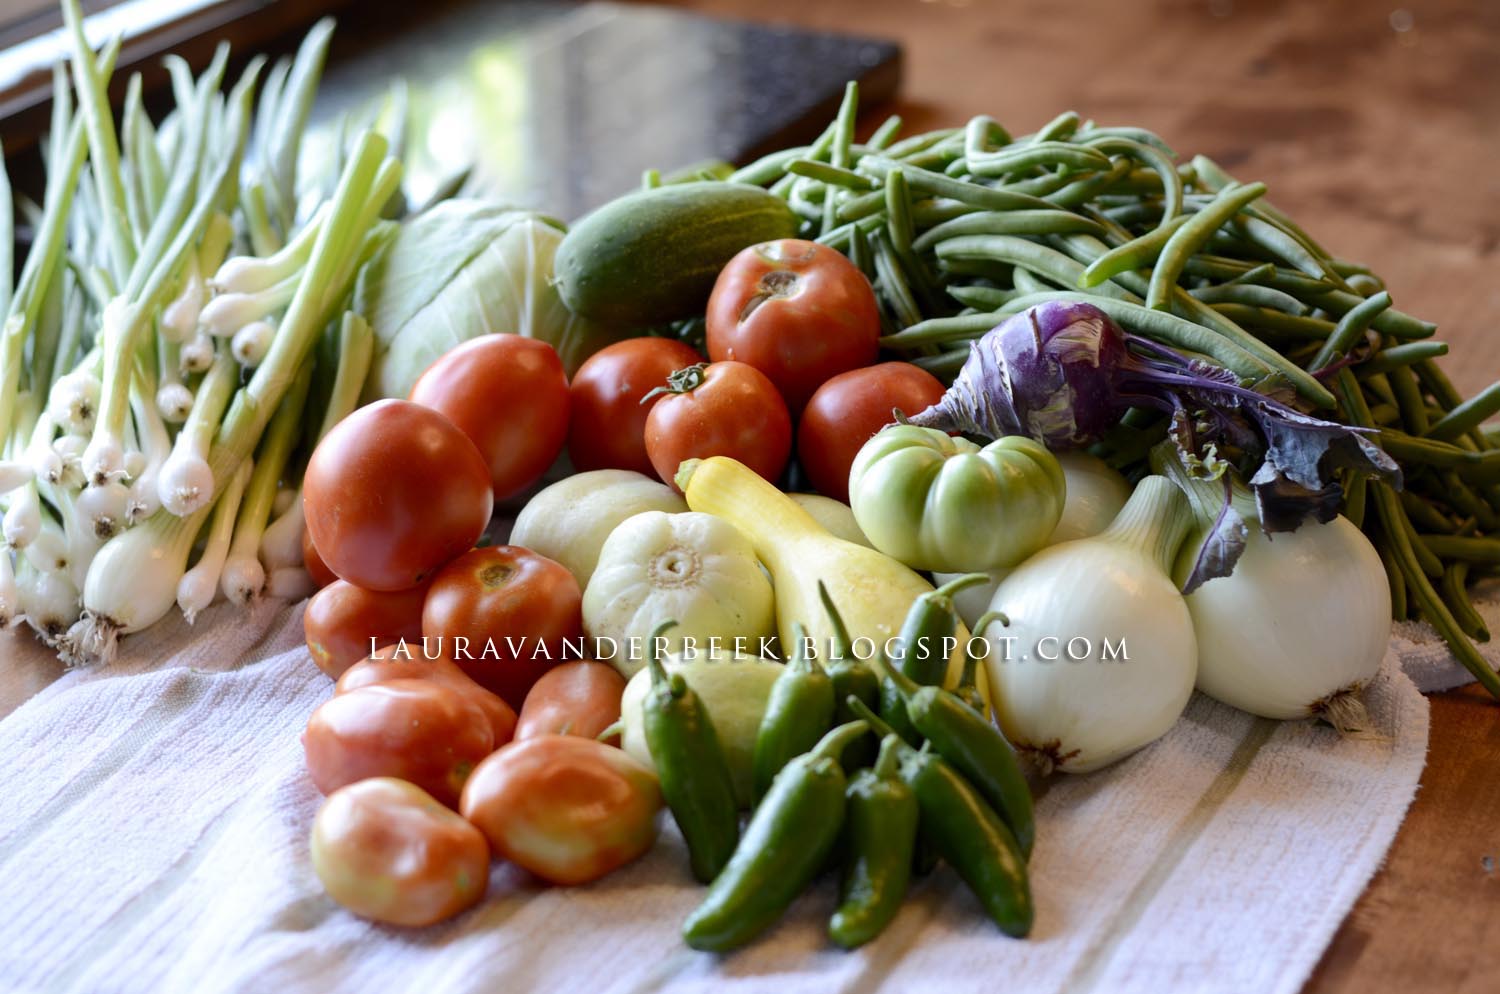
Here is today's harvest, August 15th.  There is an infestation of caterpillars.  They have orange red heads and black and grey stripe the long way.  They are all over the house and it was amazing to me that they were on everything and didn't care that it was a jalapeno, pumpkin, or onion.  I'll post a photo when I can calm down enough to get one.  They've just about destroyed my green onions.

If you've never tried a lemon cucumber you need to.  It's delicious! This one was a little bigger than the size of a baseball.

I accidentally got my first heirloom tomato.  Oops.  I love the character. This is a pink brandywine that's still green of course. I'm going to let it sit in the window sill and see if it'll ripen.


 I also did my 3rd green bean picking.  It's slowing down.  They cut the alfalfa in the field next to the garden and the grasshoppers have moved in.  Wish they'd eat the caterpillars instead of the green bean blossoms.  


And this had me super happy.  The jalapenos are starting to look good.  I didn't really need this many but I did chop up 4 and needed 3 for my pico de gallo.  It's heavenly to eat fresh pico from fresh produce.  I'll post photos soon.

I haven't done a total before so I thought I'd start today.  I think it's such a great idea and something I want to include in my garden journal from now on.

Today's Total

Alliums: 5.15 lb
Cabbage: .88 lb
Cucumber: 1.1 lb
Green Beans: 4.41 lbs
Jalapenos: .25 lb
Kohlrabi: .10 lb
Squash: .44 lb
Tomato: 3.7 lbs

Canning Green Beans - Tips

Okay, taking a break before I show you the finished product.  Here is the great illustrated guide in the Ball canning book.  It's like $5 and worth every penny.  Go get one. 

You can see the bag of preserving salt more clearly in this photo and the back of the Utensil set from Ball for canning. It's got everything except the teaspoon. 

And my Presto canner comes with instructions for Hot Pack and Raw Pack.  I prefer Hot Pack just to be sure.  When you decide to eat the green beans one thing I like to do it to bring them to a boil for 5 minutes just in case.

Sunday, August 14, 2011

canning Green Beans - part C

I love this little spatula for removing the air bubbles from the green beans.  Just run it around the sides and press inward.  

It also has these handy little notches on the other end so that you can measure the head room at the top of the jar.  Green beans need an inch.

Wipe the tops of the jars with a wet cloth to clean any residue off.  This helps get a secure fit. And this handy little lid lifter - because you don't want to try and chase these lids around in a pot of hot water.  This lid lifter helps keep things sanitary and it's a serious time saver.

Tighten the lids down but don't over do.  The air needs a little room to escape. Grab the finished 

Place the prepared jars in your pressure canner.

 Just like this.  My canner fits 7 quarts or 20 pints.  It's a Presto.  

 Close it up and bring it to a boil.  Let the steady stream of steam escape for 10 minutes. Then bring it up to pressure.  I live at 5,000 feet so the canner books says 13 lbs and the Ball canning book says 15 lbs.  It's better to be safe than sorry.  15 lbs it is.  When it reaches the right pressure then start your timer.  25 minutes for quarts.

More soon...

Saturday, August 13, 2011

Canning Green Beans - part B


After cleaning the jars and lids I like to place them in my water bath canner to keep them hot.  I place them in a couple inches of water - you don't want them to float.  After the water boils turn it down to a simmer.  

Also place the lids in simmering water - you don't want it to boil or it'll ruin them.

Strain the water out of the green beans.  I get a pyrex liquid measuring cup full of water and boil it in the microwave and have it ready to pour over the beans after they are in the jars.

Then I use this handy jar lifter to lift the hot jars out of the water bath.  

Place the jar on a dish cloth and I love this handy little funnel.  It keeps the tops of the jars clean. I prefer to fill my jars loosely with green beans.

Then I add 1 teaspoon of preserving and  pickling salt from ball.  If you use regular table salt it can turn the water cloudy.  This salt is more pure and helps keep the water cleaner looking.

More tomorrow...

Friday, August 12, 2011

Canning Green Beans - part A

This year I had the largest first picking of green beans ever! I picked 9 lbs and it covered 1/3 of my dining room table.  My children were anxious to help snap them - it only happens after the first pick.  And I was surprised they both stuck with me until it was done.  It actually went by really fast with their help.

Here is a close up of the green beans in my water bath canning pot.  

Yes, my little garden actually produced enough green beans to fill this pot.

The next step is to wash them in several changes of water.  I'm not sure how many several is so I say 3 or 4.  Sorry no photo.  Then cut them if you want.  My sister makes dill beans and doesn't cut them up.  

 Boil them for 5 minutes.  And I'll share some more tomorrow...


Thursday, August 11, 2011

Garden Harvest

This is a small harvest from the 5th.  I picked two small onions because I needed room for the larger onions to grow.  Finally harvested my first squash - that's my fault - I planted 2 and late because of the soggy wet spring.  And two kohlrabi which will sit in my fridge until I get the guts to throw them away.  
On Sunday I picked two bell peppers and one onion for fajitas since my mom and niece were here.  It was a great way to end Fast Sunday.  My mom even noticed that the bell peppers were a prettier green color than she'd ever seen in the store.  She was right.  And much more delicious!

Wednesday, August 10, 2011

Garlic Harvest

This is what I got from one row of 15 feet.  At two to three inches apart I should have harvested 60 bulbs.  I harvested 75 with only a handful of little ones.  This is my best garlic harvest in the 3 years that I've been growing garlic.  The nice thing is buying it once and then using cloves from what you grow to replant.  This makes it the most affordable plant in my garden.  No need for starting indoors, etc.  And nothing likes to eat it.  Just be careful to not over water because I've heard they can get some kind of rot and split.


Saturday, August 06, 2011

catching up with the rest

Peppers - it looks like my peppers are doing pretty well this year.  They do need to be staked up and I'll get around to that soon.  I need to make a trip to the hardware store.  

And even with the hot weather they are starting to bud.  I have a few bell peppers already showing up but the jalapenos are taking their time.

 The fern leaf dill is going crazy.  My husband pulled up two of them because he thought they were dyers woad.  I can see the resemblance except that Dyers Woad is black this time of year and doesn't smell as good.  

The nice thing about planting basil next to the tomatoes is that the horn worms hate it.  The bad thing is that the slugs are terrible this year and they LOVE basil.  Besides, all the rest of my basil has met with an early demise.  I want to get at least one batch of bruschetta please. Check out that link, it's an excellent recipe and their site is great, that is if you haven't fallen in love with it yet.

And the squash is finally growing. I love summer squash.  Grilled.

And the carrots are doing well.  The middle section of the row washed away in a heavy rainstorm so they are short than the outer edges.  But they are all growing well.

Friday, August 05, 2011

Cold weather veggies - not really

I think the cold weather veggies are my favorite to photograph. And even though it's now quite hot, they are just starting to catch up.  It's just been a weird year.  Love the purple kohlrabi.  So far I've harvested 1 columbia cabbage and two kohlrabi.  I put them in the Moo Goo Gai Pan.  Yum! They are so refreshing. 


I love having the photos to compare them to other years.  It's been super handy it figuring this whole garden thing out.

Thursday, August 04, 2011

Green Beans

I love green beans but this year they are off to a slow start.  I thought I'd take a few photos however because they are pretty. I have 5 rows of Jade bush beans. This year I actually had my health in June so I thinned them to the 3 inches apart.  Much better.  The stems are so much stronger.  They are super tender and meaty.  I don't like the beans that end up being almost hallow.  You have to get to the bulk seed shop early to get these because they go fast. 
I also found out when planting these that you have to be careful when putting the soil on top of the seeds.  Make sure the soil isn't wet and clumpy.  Freshly tilled soil works best.  Just toss it on top of the seeds and make sure they are covered an inch to inch and a half.  Don't step on the soil or even press down on it.  The lighter it is the better.  Successful sprouting will happen if you leave the soil loose and friable. 

You can see they are all kinds of tall and short.  I had to replant the far left row.  Oh and I don't know if you can see the drip line on the far right.  I ripped out the spinach and planted two more rows of beans there.  They are already up since taking the photo and blogging about it. You can click on the photo to see it larger.
Usually I pick them small and freeze them - then saute with minced garlic.  My daughter does not like them that way at all. And they don't always turn out great.  So we tried canning them last year.  Ahhh, much better.  We ALL liked them better that way. I'm really hoping for more than 6 quarts this year.

Wednesday, August 03, 2011

Day Lilies

My Day Lilies are looking pretty good this year. They were slow to bloom (long cold spring) but they look better than they have in a long time. I've planted 2 other types and they'll bloom next year.  This fall I am splitting these.  I need to place them on the hillside next to the new Ash tree.


Tuesday, August 02, 2011

Pumpkins

This is a Spirit Bush pumpkin.  It's a bush type of course, which means they take up less space.  And it seems to produce two perfect looking pumpkins per bush.  They were pretty small the week before.  And now they are bigger than a softball.  Of course I took these photos on the 24th of July.  I just took a lot of photos and its taking me this long to share.

You can see the 5 spirit bushes here and one little pumpkin enjoying some sun.

Here is the east pumpkin patch next to the green onions on the back upper tier.

And here is one sugar pie pumpkin.  We'll see if I get any pumpkins on the vine type this year.  Last year they started about September.  Too late.  They didn't even reach baseball size before the frost hit.

And here is a small Spirit Bush pumpkin hiding away in the leaves.  I just really liked the way the shadows fell across it.

And here is the West side pumpkin patch.  I planted these a little late and they just don't want to grow. Even with fertilizer! I tilled around them the other day.  I need to take the herbicide to that mess at the end.  I hate bind weed.  It looks like morning glory.  Only it's worse and it's roots can take up to 50 years to kill. I grew two yellow crook neck squash this year and they are just starting to grow squash.  I'm thinking kabobs would be great - someday.