Showing posts with label Yellow Sided Green Cheek Conure Parrot. Show all posts

Thursday, February 27, 2014

I cleaned up my square foot gardens in February

I cleaned out the weeds and I raked the tops of each of my square foot gardens. I also cleaned out the  remaining carrots (half eaten by voles) from the west square foot garden.  I couldn't turn the soil yet, still frozen about half way down. Probably a good thing. I'm thinking of creating a wire mesh cage of some sort to keep the voles out. Any ideas? I will probably have to also cover the top somehow and let the plants grow through. The voles here don't just eat my plants from underneath.

Kiwi and Mambo joined me and got some much needed vitamin D. I kept them close to the house when I switched to the south garden so they were less likely to be prey for hawks.

Monday, March 11, 2013

I'm short so I get to hem my new Silver Jeans

So here are my new indigo Silver Jeans. I love them because they are so comfortable to wear and because the pockets don't extend clear down the back of my legs and the stitching on the lateral side creates a sort of cut off making my "mom hips" look smaller. I purchased them along with two denim capris and a blouse on sale at Maurices and the extra $25 off /$100 spent. The price was hard to beat. I've tried dozens of other brands but none are as comfy.  The Suki and the Aiko are my favorite fit.

I have a pair of Silvers that I currently love and had hemmed already.  I placed those jeans on top of these jeans and made the cuff so that I could hem them. 

Then I removed this part of my sewing machine.


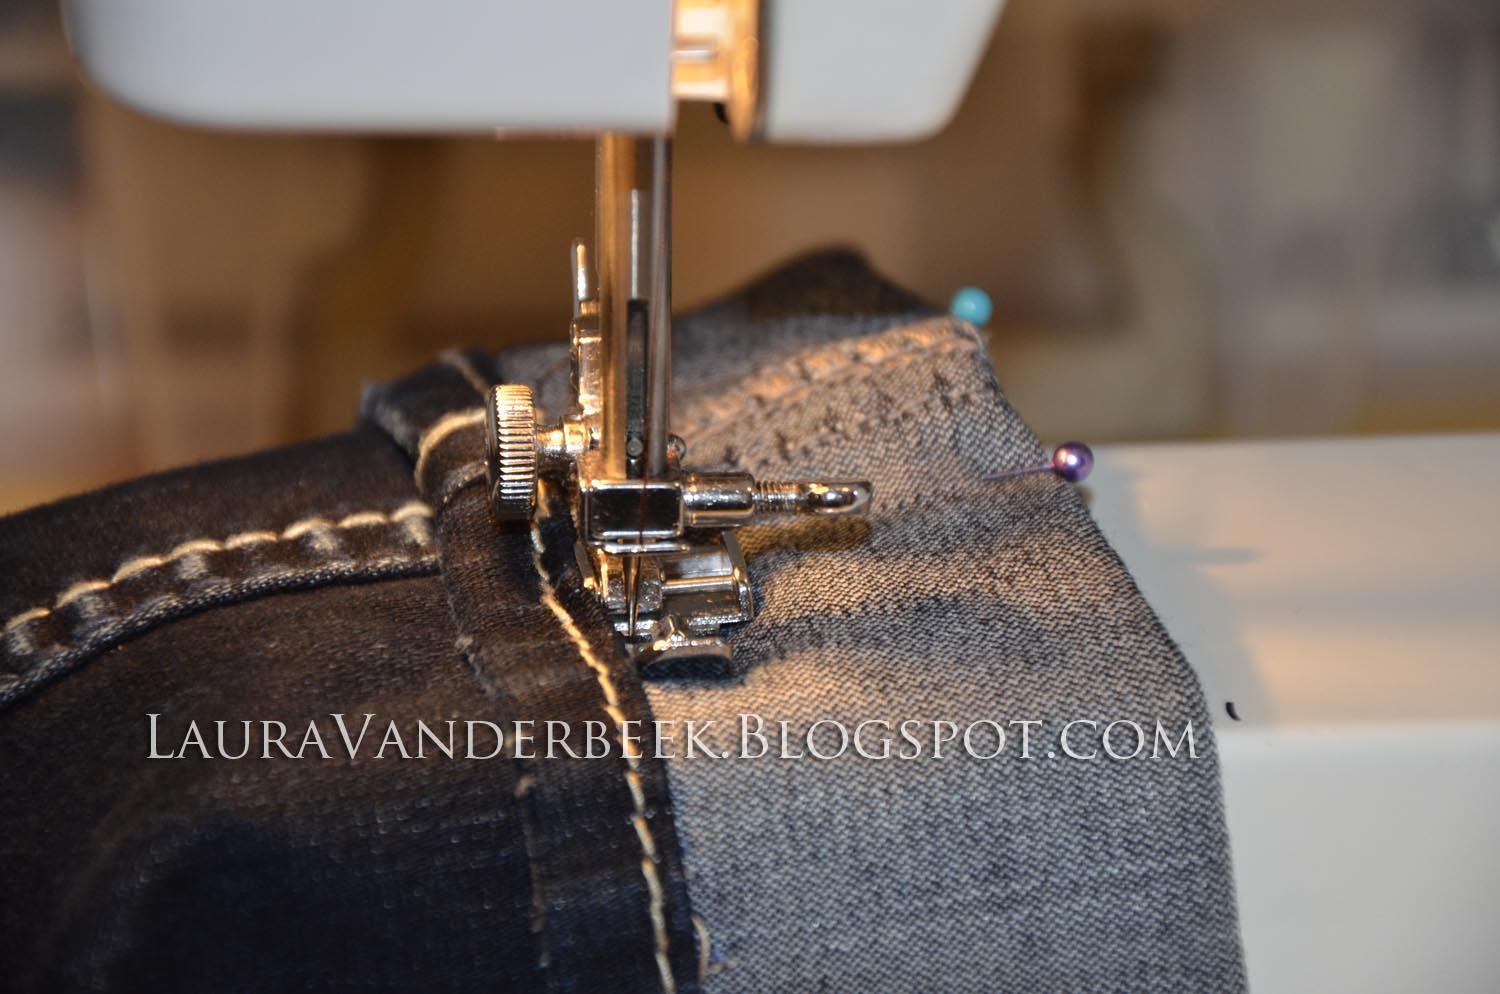
And picked out the zipper foot.
 The nice thing about the zipper foot is that you can change which side you attach it on, allowing you to get closer to the original hem of the pants. 

 While I was working on the pants I heard a little scratching and realized that Kiwi had made his way downstairs and crawled up the pant leg to say hello and get some attention.

After hemming I stitched up the medial side of the pants to keep the hem from falling out. If you can serge the hem, you will still need to do this but the cuff will be really small.  

This is the lateral side of the pants and I just stitched up that side as well, still using the zipper foot.

So now you can see that my size 26x31 jeans are still a 26 waist but much shorter leg which I didn't measure because I really don't want to know...

And as you can see, the original hem with the heavy stitching is still there but you have to look hard to see the new hem.


Tuesday, February 26, 2013

Learn more about celery and see our new parrot!

Meet Mambo! She is our new Green Cheek Conure.  She is just a little different from Kiwi. She has no yellow under her wings and she is heavier.  She is a sweetheart and in just a few days she has decided she likes us.  Last night she surprised me when she jumped off her perch and ran across the top of her cage and was half way onto my finger before I had finished the words, "Step up".  I didn't even have a treat.   Wow! Green cheeks are fast learners and sweet.  She loves a head scratch.

Now more on the garden. 
More savings:
In the garden things are needing to be thinned.  Too many plants in one pot can cause damping off.  I prefer the $3 it cost me to start all of the plants inside verses the $4/plant it would cost me if I bought them as transplants at the garden center. That's major savings.  


Less work:
And because I use peat pots and fill the totes with water instead of watering the plants themselves, I water less.  Maybe once every 5 or 6 days.  


Less Waste:
When I thin the plants I don't just toss the sprouts. They become fresh treats for Kiwi and Mambo.  Well, at least Kiwi.  We are slowly getting Mambo used to fresh veggies and sprouts. She seems to love the BirdTricks diet  but is a little wary of the sprouts.


The celery is sprouting well. I am experimenting with it a little this year.  I have 12 in these little peat starters and a bunch in 3" peat pots.  I want to see what the roots do exactly and what that will do to the full size plants.   


Here's the celery in the 3" peat pots.  I will eventually thin them down to 1 plant. Last year I had great success with celery in my square foot garden. Here's a little info about Utah Celery 52-70 from Andersons Seed and Garden:

Celery requires 10-20 days at a temperature of 65 degrees Fahrenheit to germinate. Seed should be covered and kept moist. If soil dries out, it will delay germination. Keep celery well watered while growing and spray with a good fungicide once a week and fertilize every 2 to 3 weeks. Vigorous sturdy plant produces smooth, thick, long stalks that are often 9-11" to the first joint.  Should be blanched.  120 days to harvest.
And this photo of harvested celery is from their site as well:


The green onions are looking better every day.  These are from seeds that I collected from a plant that just pops up every year and goes to seed.  

You can see from this photo how colorful Kiwi is. He's been breaking off the feathers on his shoulders.  I have some calming drops for him and I have a humidifier on.  He started it when we left him alone on Christmas day.


You can see that Mambo has a little bit of breakage as well.  Hopefully after a visit to the vet for both parrots and the spring molt, they'll both be in tip top shape!


Saturday, February 23, 2013

Indoor Garden Upgrades

So this year I decided to ditch the old plastic trays you can buy at the garden center. You know? The kind that flats of flowers come in.  Holding eighteen 3" pots filled with soil and water was fine on the tables but move them an inch and they break.  


So as you can see I upgraded to something a little more indestructible.  They have a 10 year warranty but I don't really care.  What mattered was they were about the right depth and heights and width and all 3 of those containers fit between the ladder game. And I like the clear look.  


A look in the first one shows a little container of green onions.  1 pot of bok choy, a whole bunch of celery in peat pots, 2 bell peppers, many jalapenos, and Serranos too. I'm leaning towards Salsa this year. Last year it was all about the tomato sauce (I made homemade spaghetti with 2 quarts of tomato sauce tonight and it was delicious - lasagna will be made from the left over sauce later this week).
This tray is full of cold weather veggies and items for the covered square foot garden. Summertime Lettuce, Romaine Lettuce, cabbage, broccoli, kale, and swiss chard. 

I must admit that I've NEVER eaten chard or kale - I'm only growing them for my parrots.  Oh ya, PARROTS, with an S.  Yes.  And they are super fun! We've had Kiwi, a yellow sided green cheek, since last April.  Today we purchased Mambo, a green cheek. She is not quite a year old and was living with the cutest family but her owner is moving. Today we got Mambo to jump on command, step up when asked and without biting, and target train to learn the clicker and get a treat.  Someone held her all afternoon and Kiwi even showed off his basketball skills while she watched intently. The best part was the end of the day when she let me scratch her head and neck and fell asleep in my hands. 


And last of all I have the 5" peat pots with the heirloom tomatoes.  2 are early girls but the rest are either cherokee purple or pink brandywine. I saved the seeds from the pink brandywine and they grew well last year so I'm using them again.  Best flavor ever!


Sunday, November 11, 2012

Wings

I'm letting my parrot grow out his flight feathers.  He still has about 6 that will need to come in.  They butchered his poor wings when they clipped him the day before we purchased him.  It's been fun to have a parrot fly around our house to find us and it's especially fun to have him land on our hand or shoulder.  

I love the color of his flight feathers.  The blue is just gorgeous!
I must admit I am a little nervous about loosing him so we've set up some rules in our house.  But he is so much happier now that he can fly - it will also help keep his weight in check.  And he can wear a harness.  He'd probably stop fussing with it so much if I put it on him every day.

Wednesday, October 17, 2012

My parrot can play cards

This trick took Kiwi about 15 minutes to perfect.  It started out with just touching the card with his beak - he'd get a click and a treat.  Then it progressed to him picking it up - he'd get a click and a treat. And then when he turned it over he'd get a click and a treat but he would no longer receive a treat for just bumping it with his beak or picking it up.  The next step was to get Kiwi to realize that he didn't need to turn it over and over and over.  Just flipping it over was enough for a treat. 


Tuesday, October 16, 2012

My parrot can play fetch

We love Kiwi.  He is a yellow-sided Green Cheek Conure.
He has been a really great parrot to have as a companion.  My children all love to play games with him and we all love how cuddly he is and needs his head scratched often.  I started teaching Kiwi how to play fetch a few days ago.  This trick took him a few days to catch on.  The card trick he learned in 15 minutes.  I'll share that tomorrow.

He's great for our family because I am allergic to most pets.  In fact I can't handle parrots from Australia or Africa.  I wheeze when I get around them.  So any parrots from Central or South America are just perfect. 


Saturday, September 29, 2012

Pirate pants (creating my son's halloween costume)

This has nothing to do with the Cereal Box but I thought I'd go ahead and share the other project I'm working on. 

Purchase pattern on discount sale 

Cut pattern pieces out for each item and place them with the color fabric you'll use.
Muslin - top
Brown- pants
Red - vest
Green - sash

Try to keep Kiwi from chewing on the important parts of the pattern.
He had zero interest in the pattern pieces that were scraps.  Only what I had in my hands.
But I sure do love my sweet little parrot. 
Maybe he knows he is going to be hanging out with a pirate.

Pin pattern to fabric

Cut fabric

Stitch part of the pants after pinning 

 Open, arrange next to each other, pin both pieces in the center, and stitch more.

Flip and now it almost has legs. Pin and sew outside edges together 

Iron seems open. Fold and iron waist band and bottoms of pant legs. 

Pull elastic through, sew together, and stitch to close up the waist. 

Hang pants up and wait for him to get home from school so I can do the final fitting on the pant legs.

Thursday, August 02, 2012

Canning Green Beans


 I canned green beans this week.  I showed a more step by step version last year - see HERE and HERE. It's finally starting to become second nature.

Boil the beans for 5 minutes and then place them in the colander. 


Added a tsp of canning salt per quart

Add boiling water and remove air bubbles with spatula.

Add the lids after simmering them.

Can you see the steam coming out.  Once it pops up the steam starts coming out of the right vent.  Then it's 10 minutes of venting before applying the weight to build pressure.


Kiwi hung out on my harvest basket while I canned.